| Intro | Center/Sub | MAINS | Surrounds | Installation | Lou's Home Page |
 |
Partial Finish...Then Assembly
It became quickly apparent that the cabinet was too large to glue up, then finish. So I would up finishing all the pieces before assembly. A lot of the "final" form results from my DAYG building process (Design As You Go) I chose a fairly neutral, hand mixed, brown dye in a 1 lb cut of dewaxed shellac. I made almost two quarts to be sure I had enough. I chose a dye in an effort to somewhat homogenize the chinese baltic, regular baltic, and the birch & maple veneers that would be exposed on this piece. I finished the Kaverna's first. Unfortunately I learned that I did a sloppy job of sanding and filling. I like Durhams Rock Hard Water Putty for filling brad heads. But it doesn't take dye/seal very well. On the rest of the build, I added a couple of drops of medium brown dye to the putty's mix up water. Not my best stain & finish work, but at least it's for me -- not somebody really important. The black is all Duratex applied with a little sponge roller. All intermediate parts were stained & sealed, then shot with 3 coats of Fuhr 380 waterbase acrylic varnish. The top of the top and outside of the legs were left in their virgin state as those panels will take a beating during assembly. I decided on three stationary shelves made out of the Birch/Maple plywood I had on hand. The shelves are 25.5" wide, as that was the widest I could set my tablesaw's fence. Tower & shelves are 14" deep, the legs are 15.5" deep, the top is 17" deep. At the front, everything will be recessed 1/2" to accommodate the center grill. I need a bit of space behind the legs to accommodate the base shoe molding. I hope to anchor the top directly to the rear wall. With 4 year old plywood, and hand sawn crosscuts, there's quite a bit of warping and "nearly square" corners. I do love biscuits for alignment and squaring up boxes, but all the pieces need to be square and true. So I chose to only cut slots for the two intermediate shelves and the corresponding areas on the tower & legs. I left enough room to get clamps for these two shelves. The lowest shelf will go on cleats with brad nails and light construction adhesive. Two pieces of 1/4" will cover the backs of the lower two shelves to square the piece and minimize racking. |
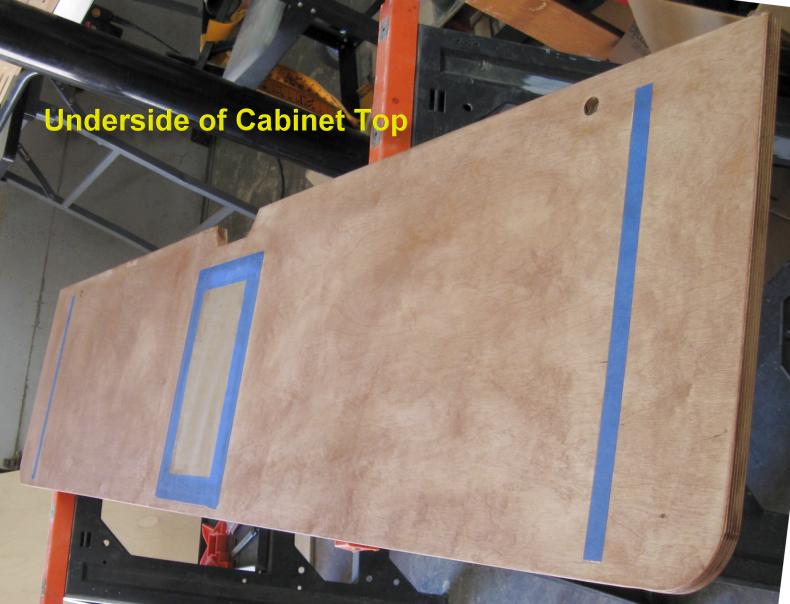
For the top, I cut a notch to pass thru the TV cables. Rounded off the outside edges to minimize pass-by bruises, and drilled a couple of holes to pass wires to the Kavernas. In the shot below, you can see where the tower will sit, and my best guess as to where the legs will finally attach. No biscuits for the legs. If they are square, I'll use trim screws or brad nails to attach. If the legs are not square, a small cleat and construction adhesive should hide the joint..
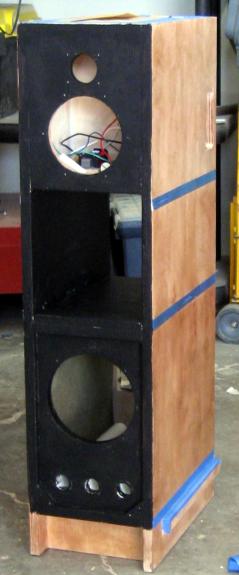
 The dye/shellac did a nice job of integrating the different types of wood.
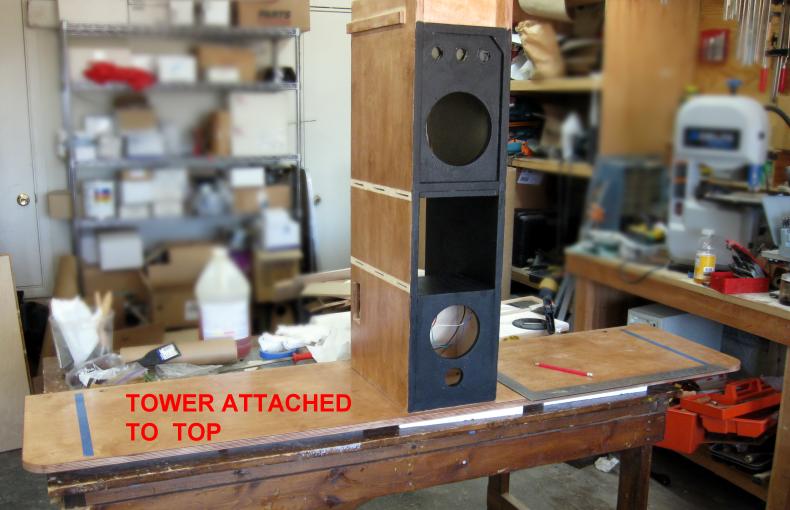
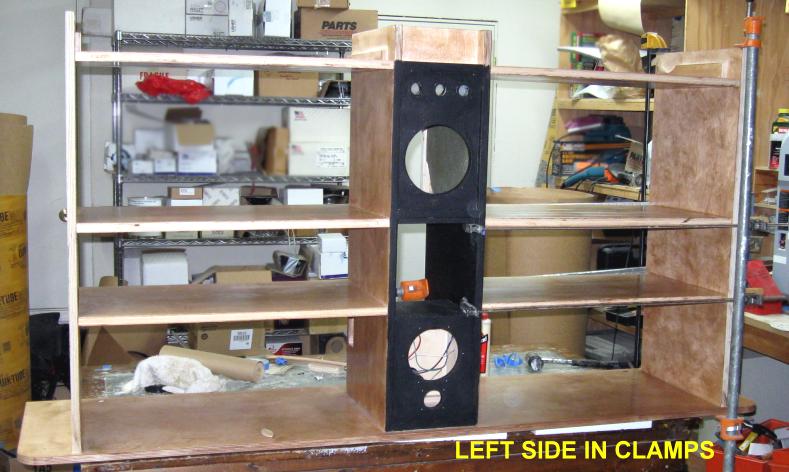 By and large, the assembly wasn't perfect, but everything squared up pretty well. We had some issues with warping and cupping of a couple of panels. What we couldn't get out with clamp pressure, we force filled with construction adhesive and brad nailed. The outside of the legs and top of the cabinet were left raw, as I knew we would be applying some grunt at this point. While I prefer Titebond 1 for most joints (water cleanup), there are times where construction adhesive is your best friend. As my dad used to say, "It'll be fine, just put some gook on it..."
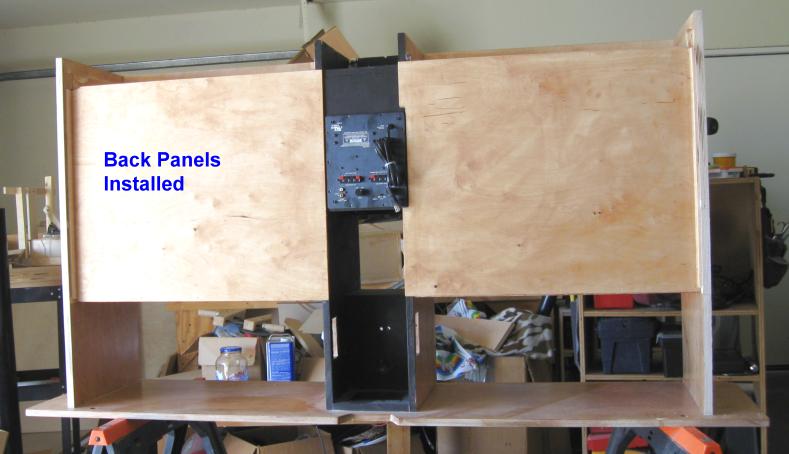
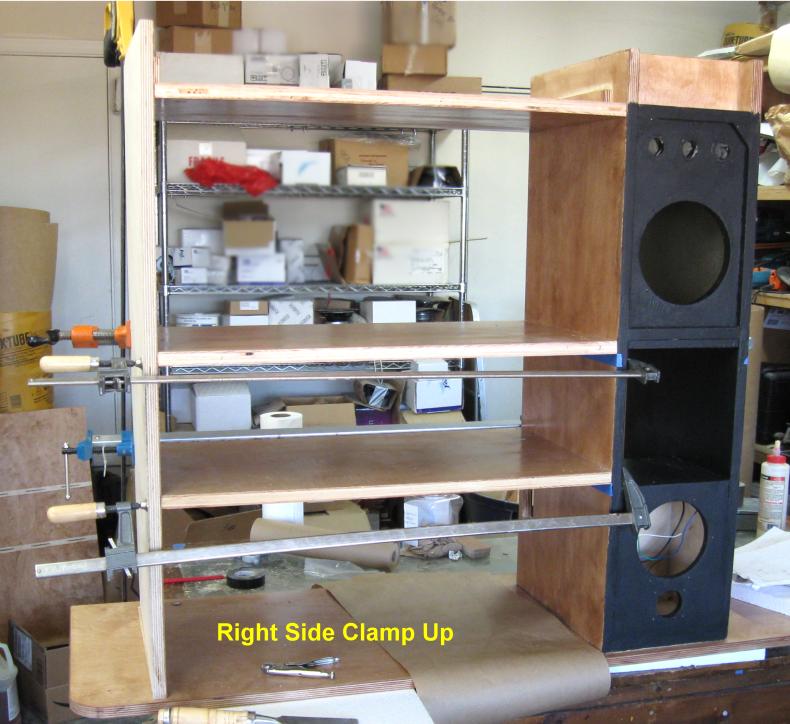
I used a tube of clear silicone and the brad nailer to glue the 1/4" back panels onto the main cabinet. The silicone should allow for a bit of expansion & contraction and hopefully minimize any buzzes & rattles from the sub. I nailed into the center tower, and along all of the shelves. It took a bit of sanding and "persuasion" to get everything tight. I left enough overlap to cover any out of square conditions. The backs just butt up against the inside of the legs. So I filled the gap, and used some 1/4" scrap furring strips along the legs to keep that joint tight. The sub-amp fit into it's home with just a bit of a cutout. I had just enough edge around the amp to take the brads. I'm amazed it came out as square and even as it did.
With the prefinishing, even the squeeze out from the PL Premium peeled of with a sharp chisel. Some of the blue painters tape took a bit of work to remove, but otherwise it was like any other assembly. I also added the toe kick panels at this point. Now I need to sand and finish the outside of the legs, the top, and the moldings for the front of the shelves.